Saturday 8 December 2012

Hide Views Menu in Blogger Dynamic Template

As said by blogger it supports following views
  • Classic
  • Flipcard
  • Magazine
  • Mosaic
  • Sidebar
  • Snapshot
  • Timeslide
But all the people do not like all the menu! I like the Sidebar view! You can configure your blog to display Dynamic Views, and select a default view that best displays the type of posts on their blog. You can simply select another view style from the toolbar, which, in some views, collapses into a thin line as you scroll. If you want to remove such toolbar fro changing the views then you can do it with school level css! 

In our blog we have hidden the Views Toolbar by the core method of editing template and not CSS method but the result is same!


STEP:-
Go to Dashboard ('House' symbol) --> Template --> Customize --> Advanced --> Add CSS --> Paste the following code --> Press enter after the last character of the last line } --> Apply to Blog --> Done


.menu {
display: none;
}
.header-drawer
{
margin-left: -5px !important;
}


For any help, please comment!

Re-size Sidebar Width in Blogger Dynamic View

Blogger Sidebar view, the best ever and said by me ever ;-). You can notice that blogger sidebar width is not enough for bigger post title! As a result title truncates. To avoid it, let us change the width of the sidebar! But before editing, I wanna say that dont keep sidebar too much wide, because it would be hard for users having less screen resolution to surf your blog! We would end up with small area for our article if Sidebar is too wide!


STEP:-
Go to Dashboard ('House' symbol) --> Template --> Customize --> Advanced --> Add CSS --> Paste the following code --> Press enter after the last character of the last line } --> Apply to Blog --> Done

.sidebar #sidebar{
width: 250px !important;
}
.sidebar #content{
margin-left: 250px;
}

The size should be set by yourself by changing the numbers in RED. Note that both values of size in red must be same! If you keep different values in both red color number then overlapping or vast space between the sidebar and article may be created!

Friday 7 December 2012

Show Date Ribbon in Sidebar View

As you can notice that I love Sidebar view very much, I have got a new CSS tweak for you! As you can see that all the blogger dynamic view offers DATE RIBBON, except Sidebar View! Why dont we add the ribbon! Ribbon adds the charm to our template! You can following this childish steps and get ribbon for sidebar view!


STEP:-
Go to Dashboard ('House' symbol) --> Template --> Customize --> Advanced --> Add CSS --> Paste the following code --> Press enter after the last character of the last line } --> Apply to Blog --> Done

.sidebar .article .article-header .date, .ss {
display: block !important;
}

.sidebar or .article or.....  etc. are required to position the ribbon  Do not edit the above code! This is the most primary code which even Google developers have to use! So enjoy!

How to change Gadget Menu from Right to Left

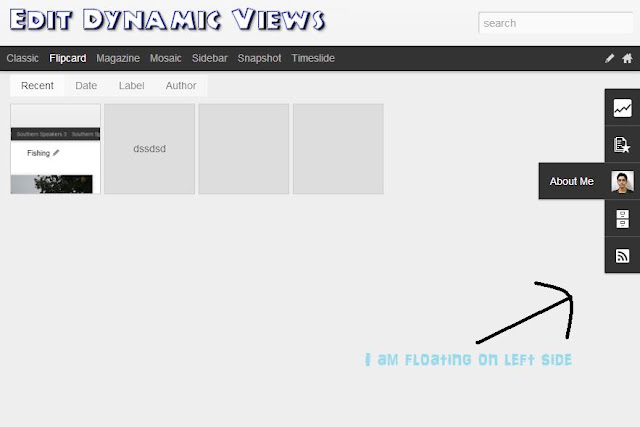
Blogger Dynamic View is supported by a floating menu for gadgets! Many gadgets are being added by blogger now a days! So it is necessary to concentrate on it! Usually blogger gadget menu is floating on right side! But when can use simple CSS and make the dock to float on left using right margin and padding of CSS! Don't think too much. Better use this simple piece of code and make your blogger blog feel good! Reposition Gadget Menu by following below given simple steps.

BEFORE

In image I mistaken this as LEFT! Sorry ;-)

AFTER


STEP:-
Go to Dashboard ('House' symbol) --> Template --> Customize --> Advanced --> Add CSS --> Paste the following code --> Press enter after the last character of the last line } --> Apply to Blog --> Done


.gadget-container:hover,
.gadget-item.ss:hover,
.gadget-item:hover .gadget-container,
.gadget-selected
.gadget-container {right: auto !important;}

#gadget-dock {
-o-transition: left 0.20s ease-in-out 0s;
-moz-transition: left 0.20s ease-in-out 0s;
left: -40px;
-webkit-transition: left 0.20s ease-in-out 0s;
-ms-transition: left 0.20s ease-in-out 0s;
}
#gadget-dock:hover,
#gadget-dock.gadget-notifying,
#gadget-dock.gadget-opening
{
left: 0.5px !important;
}
.gadget-container {
-moz-transition: left 0.20s ease-in-out 0s, opacity 0.20s ease-in-out 0s !important;
-webkit-transition: left 0.20s ease-in-out 0s, opacity 0.20s ease-in-out 0s !important;
-ms-transition: left 0.20s ease-in-out 0s, opacity 0.20s ease-in-out 0s !important;
-o-transition: left 0.20s ease-in-out 0s, opacity 0.20s ease-in-out 0s !important;
left: 0px !important;
right: -100px !important;
margin-right: 100% !important;
}

For any cross-browser complaints comment below.

Show Full Post Title in 'Flipcard' Blogger Dynamic View

The main advantage of FlipCard View is that all posts are accommodated in a single page! Also thumbnail for them are included with it! But the sad point is that Blogger truncates the bigger post titles and add '...' behind them! It make me uneasy to find the required blog post! It shows the publishing date and no of comments!

Flipcard Blogger Dynamic View


Use the below steps to remove useless publishing date and make your post title Full!

STEP:-
Go to Dashboard ('House' symbol) --> Template --> Customize --> Advanced --> Add CSS --> Paste the following code --> Press enter after the last character of the last line } --> Apply to Blog --> Done


.overlay .title, .ss{
height: 110px !important;
max-height: 110px !important;
}


Change Scroll bar in Blogger Dynamic View

Blogger dynamic view is my favourite due to its AJAX loading system! It has a creative and lucid look! Add more beauty to your dynamic blog by changing scroll bar of your blog!


STEP:-
Go to Dashboard ('House' symbol) --> Template --> Customize --> Advanced --> Add CSS --> Paste the following code --> Press enter after the last character of the last line } --> Apply to Blog --> Done


::-webkit-scrollbar{margin-right:5px;background-color:#EEE;width:10px}
::-webkit-scrollbar:horizontal{margin-right:5px;background-color:#EEE;height:7px}
::-webkit-scrollbar-thumb{border:1px #EEE solid;border-radius:12px;background:#777;-webit-box-shadow:0 0 8px #555 inset;box-shadow:0 0 8px #555 inset;-webit-transition:all .3s ease-out;transition:all .3s ease-out}
::-webkit-scrollbar-track
{-webit-box-shadow:0 0 2px #ccc;
box-shadow:0 0 2px #ccc}

DONE!

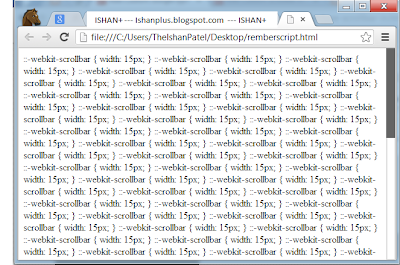
It generate scroll-bar similar to our blog! If you want another creative scroll bar then go to any of following link and get new code and paste that code instead of above given code!
1. Add Custom webkit Scrollbar for your site in Chrome
2. Add Custom Google type Scrollbar in your website - UPDATED
3. Add Custom Scrollbar in Chrome!!! - Nulled by Ishan

It works for Chrome, and may be Mozzila!

Auto resize first Letter of post in Blogger Dynamic View

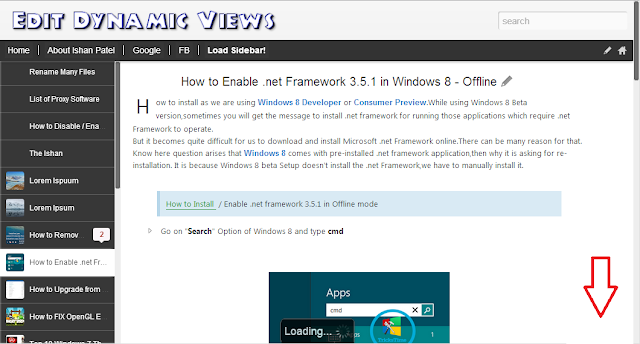
However, you can see that first letter 'H' of word However on starting of this text is auto converted to bigger size! It gives the look of a professional magazine or better blog!

I like it very much and I wish to share it with you! Just follow this simple steps:-


STEP:-
Go to Dashboard ('House' symbol) --> Template --> Customize --> Advanced --> Add CSS --> Paste the following code --> Press enter after the last character of the last line } --> Apply to Blog --> Done

.article-content.entry-content:first-letter
{
font-size:2.5em;
font-weight:normal;
padding:5px 5px;
margin-right:5px;
line-height:.8em;
float:left}


Enjoy blogging in Dynamic View and be unqiue from the world!

Expand Sidebar Posts List on 'mouse over' in Dynamic View

Blogger dynamic view sidebar is the best dyanmic view according to me! So I may be busy for finding codes for it! As a result I found expandable sidebar menu. The sidebar menu is at left side of your blog page.
Just follow this primary school steps.


STEP:-
Go to Dashboard ('House' symbol) --> Template --> Customize --> Advanced --> Add CSS --> Paste the following code --> Press enter after the last character of the last line } --> Apply to Blog --> Done


#sidebar
{
-webkit-transition:width 500ms ease-in;
z-index:99
}
#sidebar:hover:not(.selected)
{
width:350px;
!important}

Don't forget to comment below :-)

Expandable Search box in Blogger Dynamic View

Blogger dynamic view search box is my main reason to like it! If you try to search in our tiny Searchbox then it would auto expand! Then I thought to share it with you! The search box, placed at the top-right corner of your blog page can be made expandable by simple steps.


STEP:-
Go to Dashboard ('House' symbol) --> Template --> Customize --> Advanced --> Add CSS --> Paste the following code --> Press enter after the last character of the last line } --> Apply to Blog --> Done


#header input#search{-moz-transition:all 0.3s ease-in-out;-ms-transition:all 0.3s ease-in-out;-o-transition:all 0.3s ease-in-out;-webkit-transition:all 0.3s ease-in-out;transition:all 0.3s ease-in-out;}

#header input#search:focus{width:450px;}


Remove Floating Feedback button in Blogger Dynamic View

Blogger dynamic view feedback is used to seen feedback which include feature for including screenshot and various information! It is good to send feedback directly to Google! But why add such useless things! The feedback menu, placed at the bottom-right corner of blog page can be removed by short and simple step using CSS display:none method.

Before


AFTER


STEP:-
Go to Dashboard ('House' symbol) --> Template --> Customize --> Advanced --> Add CSS --> Paste the following code --> Apply to Blog --> Done


a.feedback {display:none;}


You are done!

Remove Search box in Blogger Dynamic View


Blogger dynamic view search box is my main reason to like it! But if you want to remove it, I wont argue with you! The search box, placed at the top-right corner of your blog page can be removed by short and simple step using CSS display:none method,

BEFORE


AFTER


STEP:-
Go to Dashboard ('House' symbol) --> Template --> Customize --> Advanced --> Add CSS --> Paste the following code --> Press enter after the last character of the last line } --> Apply to Blog --> Done


.header-bar
 #search
{
       display: none !important;
}


Thursday 6 December 2012

Add Scroll bar to Sidebar in Blogger Dynamic View


As you can see we in our blog also use sidebar for Dynamic View! Sidebar is best as SEO is concerned!
It is also the only template in Dynamic View that allows you to view the content of a post while still maintaining the complete list of posts in the sidebar! It uses AJAX for this! The posts in sidebar are shown upto screen limit without scrollbar! Better load all the past posts in scrollbar by this easy and simple method!

We in our blog also use it!


BEFORE

AFTER


To add scroll-bar follow this simple step:-
Go to Dashboard --> Template --> Customize --> Advanced --> Add CSS --> Paste the following code --> Press enter After the last character of the last line  --> Apply to Blog. 


div#sidebar { overflow-y: scroll !important; }


Add Picture Menu in Blogger Dynamic View

As you already know that blogger don't allow to edit HTML in Dynamic Views, we are going to use CSS method for it. Note:If you have a drop-down pages menu in your Dynamic Views, then your images would not load perfectly or you need to re-size them! Also the CSS used by us, is not supported in earlier version of IE8.


This tutorial aims to change text of auto generated Pages Menu. So better make new pages or add Links to other pages in Pages section!

STEP 1
Create your own required buttons / Logos from Cooltext! Our logo is also from Cooltext

STEP 2
Upload images to picasaweb or imgur.com or any other free image hosting service and get Image links
e.g. https://blogger.googleusercontent.com/img/b/R29vZ2xl/AVvXsEi3lNdlA91O6HyTBkYpAmqX1johHSg3e-qDI3KpOcOSbRVsR6b49GaGSC3wD8TU3yMIMj4mrOkksktyudcOlx1h1fe2DlfhBpyql0ICZjSqaoYqEoANVxzIdoQbjoF_kmvCrcsUQRgzj-TC/s1600/cooltext844981581.png

STEP 3
Go to Dashboard  --> Template --> Customize --> Advanced --> Add CSS  --> Paste the below given code  --> Apply to Blog.
If it doesn't work then press enter after last line of pasted code!

#header
#pages.tabs ul{
margin-left: 5px !important;
}
  
#header .tabs li {
display: inline-block;
height: auto;
line-height: auto;
margin: 0px;
}
 
#pages.tabs ul li:nth-child(1) a:link{
background: url('http://tinyurl.com/blgdyn3') center no-repeat !important;
font-size: 1%;
color: transparent !important;
display: block;
width: 100px !important;
height: 25px;
}
 
#pages.tabs ul li:nth-child(2) a:link{
background: url('http://tinyurl.com/blgdyn1') center no-repeat !important;
font-size: 1%;
color: transparent !important;
display: block;
width: 100px !important;
height: 25px;
}
  
#pages.tabs ul li:nth-child(3) a:link{
background: url('http://tinyurl.com/blgdyn2') center no-repeat !important;
font-size: 1%;
color: transparent !important;
display: block;
width: 100px !important;
height: 25px;
}


Change the above links in red with our own image links! You're Done!

If you want more images to add then add the below code again and again for more and more conversion

e.g. for converting 4th menu link to image add NEW_PICTURE_NUMBER  = 4 and change IMAGE_LINK

#header


#pages.tabs ul li:nth-child(NEW_PICTURE_NUMBER) a{
background: url('IMAGE_LINK') center no-repeat !important;
font-size: 1%;
color: transparent !important;
width: 100px !important;
display: block;
height: 25px;
}


How to add Separators Between Pages Links in Blogger Dynamic View?

As you can see in our blog there is seperator between page links! The links in the header menu bar is as the template could accommodate several horizontal Pages links as well as external. Dynamic Template is Responsive, so it changes to drop down menu if the number of links increases!

Go to Dashboard --> Template --> Customize --> Advanced --> Add CSS -->
Paste the code given below and SAVE (Apply to Blog)
#header
#pages:before{
border-left: 0px !important;
}
#header
.tabs li, .ss{
margin-left:0px !important;
padding-left: 10px !important;
padding-right: 5px !important;
border-left: 1px solid white;
}

How to Stop Blogger Country Level Redirect?

The redirection on Blogger country specific URL is technically called as country code top-level domain (ccTLD ). This top-level domain is reserved for respective countries and when the user of specific country opens, domain for that country is opened! But it decrease the page rank as well as Alexa Rank! So to grab more users from Google, we need to make our blog, a .com blog only!


How to stop redirecting the URLs?
You can always view the .com part of any blogspot using /ncr with the URL as shown below:
Normal URL without /ncr >>> http://analytics.blogspot.com/   (This will redirect to country specific URL)
With /ncr >> http://analytics.blogspot.com/ncr 


Disabling Country Specific URL Redirection by Implementing /ncr via Script:

Step 1: Go to Blogger Dashboard > Click Blog > Click "Template" > Edit HTML

Step 2: Search </head>


And paste the code before </head>


Step 3: Save the template. You are done! :-)

Now, your blogspot.com domain will not redirect to country level domain. We have installed this small and simple script into the template to stop the redirection successfully.


FOR DYNAMIC BLOGGER THEME, YOU NEED TO ADD THIS TO DYNAMICVIEWS.js file and then add below sidebar.js in your template!