Saturday 8 December 2012

Hide Views Menu in Blogger Dynamic Template

As said by blogger it supports following views
  • Classic
  • Flipcard
  • Magazine
  • Mosaic
  • Sidebar
  • Snapshot
  • Timeslide
But all the people do not like all the menu! I like the Sidebar view! You can configure your blog to display Dynamic Views, and select a default view that best displays the type of posts on their blog. You can simply select another view style from the toolbar, which, in some views, collapses into a thin line as you scroll. If you want to remove such toolbar fro changing the views then you can do it with school level css! 

In our blog we have hidden the Views Toolbar by the core method of editing template and not CSS method but the result is same!


STEP:-
Go to Dashboard ('House' symbol) --> Template --> Customize --> Advanced --> Add CSS --> Paste the following code --> Press enter after the last character of the last line } --> Apply to Blog --> Done


.menu {
display: none;
}
.header-drawer
{
margin-left: -5px !important;
}


For any help, please comment!

Re-size Sidebar Width in Blogger Dynamic View

Blogger Sidebar view, the best ever and said by me ever ;-). You can notice that blogger sidebar width is not enough for bigger post title! As a result title truncates. To avoid it, let us change the width of the sidebar! But before editing, I wanna say that dont keep sidebar too much wide, because it would be hard for users having less screen resolution to surf your blog! We would end up with small area for our article if Sidebar is too wide!


STEP:-
Go to Dashboard ('House' symbol) --> Template --> Customize --> Advanced --> Add CSS --> Paste the following code --> Press enter after the last character of the last line } --> Apply to Blog --> Done

.sidebar #sidebar{
width: 250px !important;
}
.sidebar #content{
margin-left: 250px;
}

The size should be set by yourself by changing the numbers in RED. Note that both values of size in red must be same! If you keep different values in both red color number then overlapping or vast space between the sidebar and article may be created!

Friday 7 December 2012

Show Date Ribbon in Sidebar View

As you can notice that I love Sidebar view very much, I have got a new CSS tweak for you! As you can see that all the blogger dynamic view offers DATE RIBBON, except Sidebar View! Why dont we add the ribbon! Ribbon adds the charm to our template! You can following this childish steps and get ribbon for sidebar view!


STEP:-
Go to Dashboard ('House' symbol) --> Template --> Customize --> Advanced --> Add CSS --> Paste the following code --> Press enter after the last character of the last line } --> Apply to Blog --> Done

.sidebar .article .article-header .date, .ss {
display: block !important;
}

.sidebar or .article or.....  etc. are required to position the ribbon  Do not edit the above code! This is the most primary code which even Google developers have to use! So enjoy!

How to change Gadget Menu from Right to Left

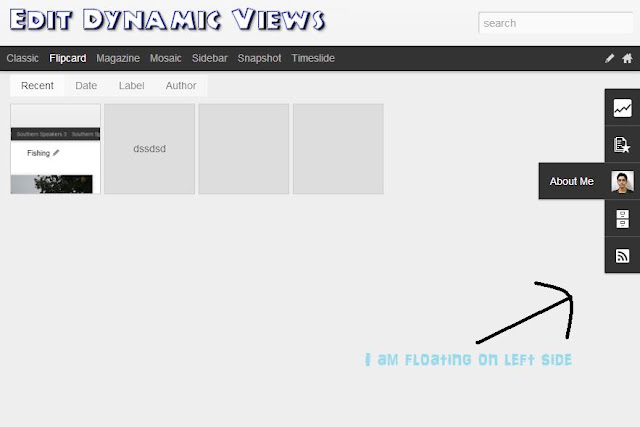
Blogger Dynamic View is supported by a floating menu for gadgets! Many gadgets are being added by blogger now a days! So it is necessary to concentrate on it! Usually blogger gadget menu is floating on right side! But when can use simple CSS and make the dock to float on left using right margin and padding of CSS! Don't think too much. Better use this simple piece of code and make your blogger blog feel good! Reposition Gadget Menu by following below given simple steps.

BEFORE

In image I mistaken this as LEFT! Sorry ;-)

AFTER


STEP:-
Go to Dashboard ('House' symbol) --> Template --> Customize --> Advanced --> Add CSS --> Paste the following code --> Press enter after the last character of the last line } --> Apply to Blog --> Done


.gadget-container:hover,
.gadget-item.ss:hover,
.gadget-item:hover .gadget-container,
.gadget-selected
.gadget-container {right: auto !important;}

#gadget-dock {
-o-transition: left 0.20s ease-in-out 0s;
-moz-transition: left 0.20s ease-in-out 0s;
left: -40px;
-webkit-transition: left 0.20s ease-in-out 0s;
-ms-transition: left 0.20s ease-in-out 0s;
}
#gadget-dock:hover,
#gadget-dock.gadget-notifying,
#gadget-dock.gadget-opening
{
left: 0.5px !important;
}
.gadget-container {
-moz-transition: left 0.20s ease-in-out 0s, opacity 0.20s ease-in-out 0s !important;
-webkit-transition: left 0.20s ease-in-out 0s, opacity 0.20s ease-in-out 0s !important;
-ms-transition: left 0.20s ease-in-out 0s, opacity 0.20s ease-in-out 0s !important;
-o-transition: left 0.20s ease-in-out 0s, opacity 0.20s ease-in-out 0s !important;
left: 0px !important;
right: -100px !important;
margin-right: 100% !important;
}

For any cross-browser complaints comment below.

Show Full Post Title in 'Flipcard' Blogger Dynamic View

The main advantage of FlipCard View is that all posts are accommodated in a single page! Also thumbnail for them are included with it! But the sad point is that Blogger truncates the bigger post titles and add '...' behind them! It make me uneasy to find the required blog post! It shows the publishing date and no of comments!

Flipcard Blogger Dynamic View


Use the below steps to remove useless publishing date and make your post title Full!

STEP:-
Go to Dashboard ('House' symbol) --> Template --> Customize --> Advanced --> Add CSS --> Paste the following code --> Press enter after the last character of the last line } --> Apply to Blog --> Done


.overlay .title, .ss{
height: 110px !important;
max-height: 110px !important;
}


Change Scroll bar in Blogger Dynamic View

Blogger dynamic view is my favourite due to its AJAX loading system! It has a creative and lucid look! Add more beauty to your dynamic blog by changing scroll bar of your blog!


STEP:-
Go to Dashboard ('House' symbol) --> Template --> Customize --> Advanced --> Add CSS --> Paste the following code --> Press enter after the last character of the last line } --> Apply to Blog --> Done


::-webkit-scrollbar{margin-right:5px;background-color:#EEE;width:10px}
::-webkit-scrollbar:horizontal{margin-right:5px;background-color:#EEE;height:7px}
::-webkit-scrollbar-thumb{border:1px #EEE solid;border-radius:12px;background:#777;-webit-box-shadow:0 0 8px #555 inset;box-shadow:0 0 8px #555 inset;-webit-transition:all .3s ease-out;transition:all .3s ease-out}
::-webkit-scrollbar-track
{-webit-box-shadow:0 0 2px #ccc;
box-shadow:0 0 2px #ccc}

DONE!

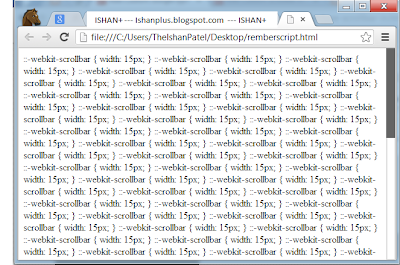
It generate scroll-bar similar to our blog! If you want another creative scroll bar then go to any of following link and get new code and paste that code instead of above given code!
1. Add Custom webkit Scrollbar for your site in Chrome
2. Add Custom Google type Scrollbar in your website - UPDATED
3. Add Custom Scrollbar in Chrome!!! - Nulled by Ishan

It works for Chrome, and may be Mozzila!

Auto resize first Letter of post in Blogger Dynamic View

However, you can see that first letter 'H' of word However on starting of this text is auto converted to bigger size! It gives the look of a professional magazine or better blog!

I like it very much and I wish to share it with you! Just follow this simple steps:-


STEP:-
Go to Dashboard ('House' symbol) --> Template --> Customize --> Advanced --> Add CSS --> Paste the following code --> Press enter after the last character of the last line } --> Apply to Blog --> Done

.article-content.entry-content:first-letter
{
font-size:2.5em;
font-weight:normal;
padding:5px 5px;
margin-right:5px;
line-height:.8em;
float:left}


Enjoy blogging in Dynamic View and be unqiue from the world!